


WEBサイト制作・アプリ開発・システム開発・ブランディングデザイン制作に関するご相談はお気軽にご連絡ください。
構想段階からじっくりとヒアリングし、お客様の課題にあわせたアプローチ手法でお客様の“欲しかった”をカタチにしてご提案いたします。
Blog スタッフブログ
Swift
システム開発
[Swift]iOS13でPopover式の選択UIをお手軽に実装する

こんにちは、株式会社MIXシステム開発担当のBloomです。
早速本題の[Swift]iOS13でPopover式の選択UIをお手軽に実装する方法について、
お仕事の中で得た知見を共有させていただきたいと思います。
Popover式の選択UIについて
まず、iOS14以降であればUIMenuをUIButtonから呼び出すことができるため、Storyboard上の記述でUIMenuButtonを指定するだけでこのような選択UIの実現が可能です。
class ViewController: UIViewController {
    @IBOutlet weak var menuButton: UIButton!
    override func viewDidLoad() {
        super.viewDidLoad()
        let items = UIMenu(options: .displayInline, children: [
            UIAction(title: "1", image: nil, handler: { _ in
            }),
            UIAction(title: "2", image: nil, handler: { _ in
            }),
            UIAction(title: "3", image: nil, handler: { _ in
            }),
        ])
        let destruct = UIAction(title: "削除する", image: nil, attributes: .destructive) { _ in }
        menuButton.menu = UIMenu(title: "", children: [destruct, items])
        menuButton.showsMenuAsPrimaryAction = true
    }
}
実行結果
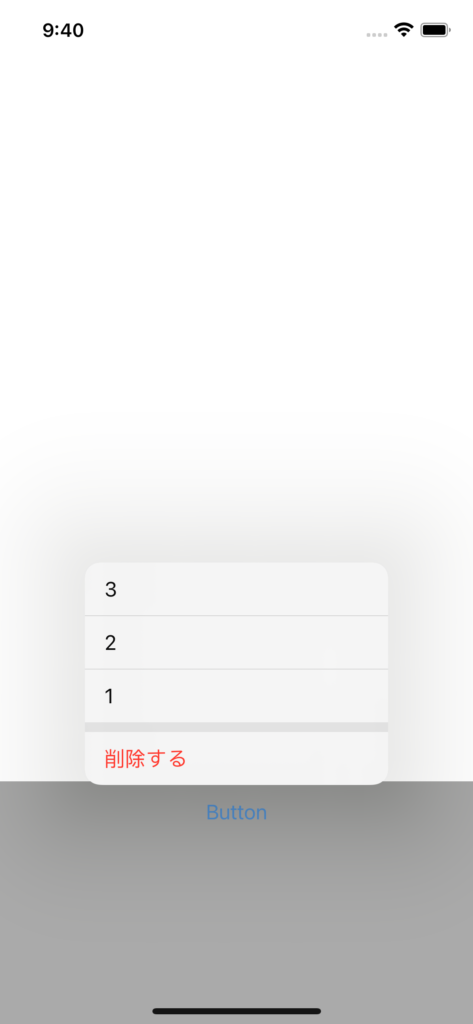
灰色のViewはbackgroundViewとbuttonの階層を分けるために設置しています。
簡単な選択UIであればこちらを利用した方が良いのですが、iOS13環境では利用できないことと複雑なUIは実現できないため今回は選択UI用に生成したViewControllerを参照する方法を利用します。
class ViewController: UIViewController {
    @IBAction func selectButtonTouchUpInside(_ sender: UIButton) {
        let storyboard = UIStoryboard(name: "Main", bundle: nil)
        // Storyboardに選択用のTableViewControllerを設置しStoryboard IDをTableViewControllerと設定しています
        let vc = storyboard.instantiateViewController(withIdentifier: "TableViewController")
        vc.modalPresentationStyle = .popover
        vc.popoverPresentationController?.permittedArrowDirections = .down
        vc.popoverPresentationController?.delegate = self
        vc.popoverPresentationController?.sourceView = sender.superview
        vc.popoverPresentationController?.sourceRect = sender.frame
        present(vc, animated: true)
    }
}
extension ViewController: UIPopoverPresentationControllerDelegate {
    func adaptivePresentationStyle(for controller: UIPresentationController,
                                   traitCollection: UITraitCollection) -> UIModalPresentationStyle {
        return .none
    }
}
実行結果
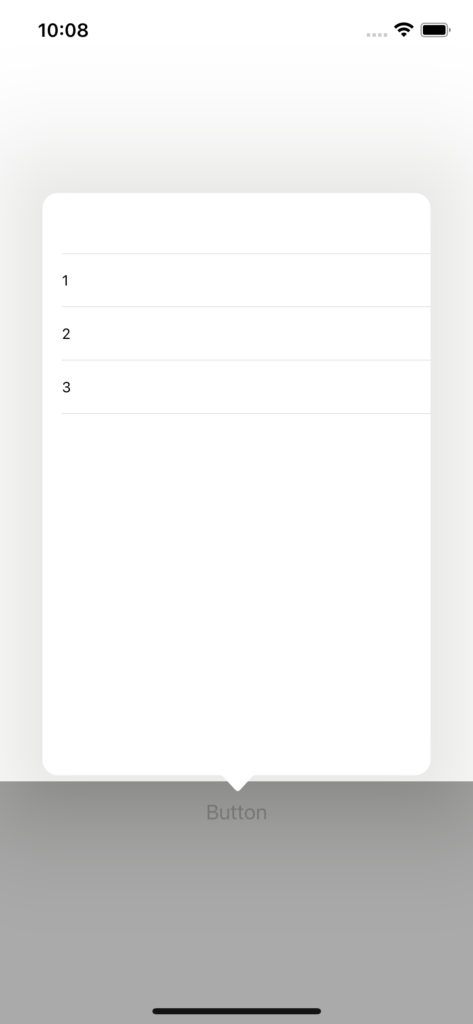
これで選択UIの表示ができました。あとはこのTableViewControllerにdelegateを実装し入力を受け取るなどしましょう。良かったですね。